Dockerfiles are commonly used to build containerized applications.
Most developers are familiar with common instructions like FROM, RUN, CMD, COPY, and EXPOSE, but there are other powerful yet lesser-known instructions.
In this guide we will explore some lesser-known but useful Dockerfile instructions.
Let’s get started.
1. SHELL
The SHELL instruction lets you change the default shell used for commands run in RUN instructions.
By default, Docker uses sh -c. However, you can switch to other shells such as PowerShell on Windows or bash for Linux.
SHELL ["/bin/bash", "-c"]
RUN echo "Using Bash shell now!"SHELL command in a Dockerfile impacts how commands are run during image build and in the container by default.Kubernetes generally bypasses the Dockerfile’s
SHELL setting unless you explicitly configure the pod's command or args to use it.2. HEALTHCHECK
The HEALTHCHECK instruction helps monitor your container's health.
It allows you to specify a command that Docker will run with a specific interval to check if the container is functioning correctly.
HEALTHCHECK --interval=30s --timeout=5s --retries=3 \
  CMD curl --fail http://localhost/ || exit 1
This instruction ensures the container runs smoothly by checking the specified endpoint every 30 seconds.
If the health check fails, Docker will mark the container as unhealthy.
This instruction only shows if the container is healthy or unhealthy, and there is no default restart if the container is unhealthy.
You can check if the container is healthy or unhealthy using the following command.
docker inspect --format='{{.State.Health.Status}}' <container-id>
HEALTHCHECK is mainly beneficial in scenarios where Docker itself is responsible for monitoring the container’s health. Kubernetes ignores Docker HEALTHCHECK instructions. Instead, Kubernetes uses its own probe mechanisms (Liveness, Readiness and Startup Probes)
3. STOPSIGNAL
The STOPSIGNAL instruction sets the system call signal that will be sent to the container to stop it.
SIGTERM requests graceful termination with cleanup, while SIGKILL forcefully stops a process immediately without cleanup.
By default, Docker uses SIGKILL, which forcefully terminates the container without giving the application time to clean up.
Changing this to SIGTERM or another signal can allow for a graceful shutdown, where the application has time to save state and release resources.
STOPSIGNAL SIGTERMThis ensures that SIGTERM is used instead of the default SIGKILL, allowing applications to clean up resources properly.
The container will have
terminationGracePeriodSeconds (default 30 seconds) to shut down gracefully.If the container hasn't stopped within this grace period, Kubernetes will send a SIGKILL signal, which cannot be caught or ignored.
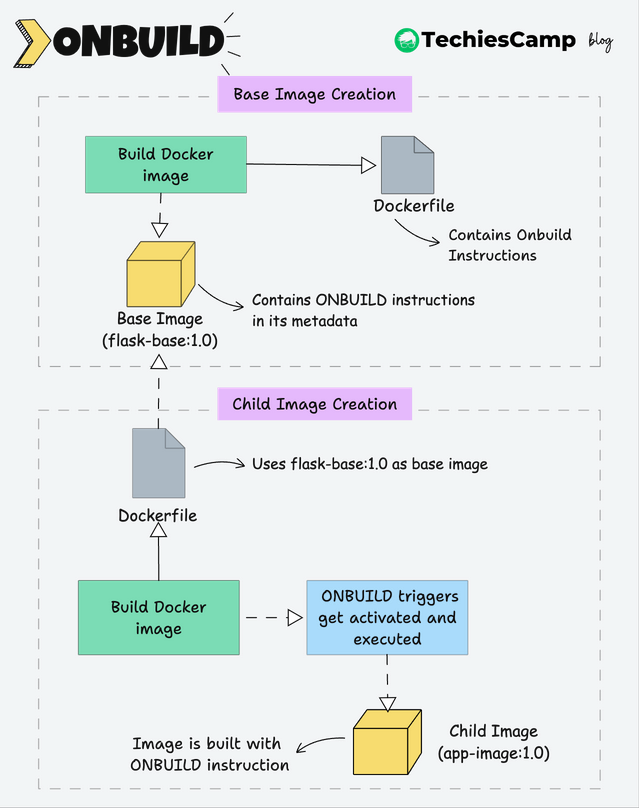
4. ONBUILD
The ONBUILD instruction sets triggers that are executed when the image is used as a base for other images. You can compare this to a startup script in a VM image, which runs automatically when the VM is started with that image.
For example,
ONBUILD COPY requirements.txt /app/
ONBUILD RUN pip install --no-cache-dir -r requirements.txt
ONBUILD COPY . /app
When another Dockerfile uses the flask-base:1.0 image as its base, the ONBUILD instructions will automatically execute. This eliminates the need to duplicate steps like copying the requirements.txt file, installing dependencies, and copying application files to the /app directory in every Dockerfile used by different teams.
Implementing All Instructions
Now, we’ll look at a practical example that showcases the use of the above instruction.
We will use a simple Python Flask application for this demo.
Create a Dockerfile and copy the below Dockerfile content.
FROM python:3.11-slim

WORKDIR /app

RUN apt-get update && apt-get install -y --no-install-recommends \
    curl && \
    apt-get clean && \
    rm -rf /var/lib/apt/lists/*

SHELL ["/bin/bash", "-c"]

EXPOSE 5000

STOPSIGNAL SIGTERM

ONBUILD COPY requirements.txt /app/
ONBUILD RUN pip install --no-cache-dir -r requirements.txt
ONBUILD COPY . /app

HEALTHCHECK --interval=30s --timeout=5s --retries=3 CMD curl --fail http://localhost:5000/ || exit 1

CMD ["python", "app.py"]
Dockerfile Explanation:
- Copy
requirements.txtto the/appdirectory from the build context. - Install dependencies by running
pip installusing therequirements.txtfile. - Copy all files from the build context to the
/appdirectory.
Step 2: Build the Base Image
Run the following command to build the application.
docker build -t flask-base:1.0 .This command creates an image named flask-base with the tag 1.0 using the Dockerfile instructions above.
Step 3: Create Required App Files
Now, let's create required app field to test the base image with ONBUILD instructions to build and run flask application.
Create app.py
from flask import Flask

app = Flask(__name__)

@app.route('/')
def hello_world():
    return 'Hello, World!'

if __name__ == '__main__':
    app.run(host='0.0.0.0')
Create requirements.txt with the following.
Flask==2.2.5Step 4: Creating Child Image Dockerfile
Each Flask project can now use the flask-base image as its base. The ONBUILD instructions ensure that:
requirements.txtis automatically copied and dependencies are installed.- Application code is copied into the container.
Create a Dockerfile with the following content in the same folder where you have app.py and requirements.txt.
FROM flask-base:1.0

CMD ["python", "app.py"]
As you can see, we are not specifying any commands related to dependency installation or copying the requirements or code files because these are part of the ONBUILD instructions in the base image.
Build the app child image using the following command.
docker build -t flask-app:1.0 .When building the app image, Docker will display messages for the triggered ONBUILD instructions:
In the follwing output, the highlighted steps showcase the use of ONBUILD instructions:
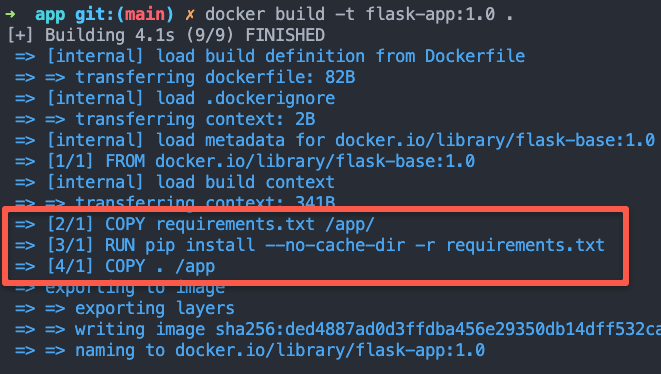
These steps are executed automatically because of the ONBUILD instructions defined in the base image (flask-base:1.0). The ONBUILD triggers these actions when building the child image, even though they are not explicitly stated in your Dockerfile
Step 5: Run and Verify the App Child Image
Run the child Docker image using the following command.
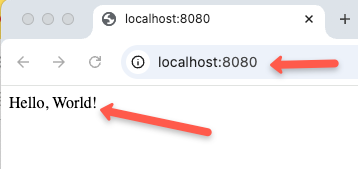
docker run -d -p 8080:5000 flask-app:1.0Now, access it on the browser you can see the page as shown below.
Step 6: Check the Health of the Container
Since, we have also added the HEALTHCHECK instruction we can check the health of the container.
Run the following command to check the health.
docker inspect --format='{{.State.Health.Status}}' bb292a95c163Replace bb292a95c163 with your container ID.
If the container is health you will get an output as shown below.
➜ docker inspect --format='{{.State.Health.Status}}' bb292a95c163

healthy
Conclusion
Understanding and using these lesser-known Dockerfile instructions can significantly enhance container management and build processes.
By using SHELL, HEALTHCHECK, STOPSIGNAL, and ONBUILD instructions, developers can customize shell environments, implement health checks, make graceful application shutdown.
Try using these commands in your next project to make use of their full potential.