Using Ngrok with Kubernetes: A Practical Guide
Expose Local Kubernetes Cluster Applications With Ngrok DNS.

In this guide, we will explore how to leverage Ngrok to expose applications running on a local development cluster with a public DNS.
Kubernetes is great for running applications in a cloud environments.
However, exposing these applications for development and testing can be complex, especially when your Kubernetes cluster is running locally or in a private environment.
Let’s say you’re developing a web application locally and have deployed it on your local Kubernetes cluster, but you need to share it with others. Or, let’s say you’ve deployed Jenkins locally and need to test the webhook from GitHub. These use cases would require the applications to be deployed publicly on cloud servers.
To enable a similar workflow with local clusters, Ngrok provides a solution. It allows local applications to be exposed to the internet through secure tunnels.
Instead of deploying your application to a remote k8s cluster, Ngrok lets you instantly share your local application endpoint through a secure, public URL. It is simple, secure, and fast way to expose your Kubernetes services running locally.

Setup Prerequisites
The following are the prerequisites for exposing an application using Ngrok public URLs.
- Ngrok Account: You need to create an Ngrok account to use its features. Both free and paid versions are available. You can signup here.
- Kubernetes Cluster: You can use Minikube, Kind, or any self-hosted Kubernetes cluster (kubeadm).
- Kubectl: The command-line tool to manage Kubernetes.
- Helm: We will be using Helm to install the Ngrok Operator.
Creating Ngrok API Token
We need to create the Ngrok API token before proceeding with the setup and installation.
On the main homepage, under the Identity & Access section, the API Keys option is available. By default, no keys will be present, so we need to create one and save it for future use.

Creating Ngrok Free Domain
Just like the API key, we need to create the domain before proceeding with the installation and setup.
On the main homepage, under Universal Gateway Domains, there will be no domain by default. We need to create one before starting the setup.
Additional components, such as Edges, will be automatically created in the backend once Ngrok is deployed.

Creating Ngrok Auth Token
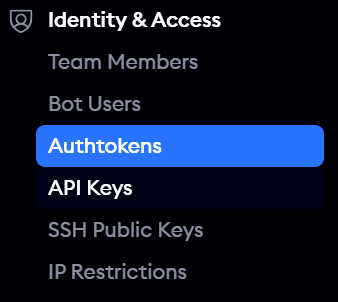
This Auth token will be created one by default, but we can note this down for exporting it as a variable during the installation step.
On the main homepage, under the Identity & Access section, the Authtokens is listed.

Setting Up Ngrok with Kubernetes: Step-by-Step Guide
Now it's time to begin the setup and installation.
I assume you have a working local Kubernetes cluster. All the steps provided in this section need to be executed on your local Kubernetes cluster.

Export Required Env Variables
We need to export the following environment variables with the correct values. These values will be used by the Helm chart for the operator configuration.
- NGROK_API_KEY
- NGROK_DOMAIN
- NGROK_AUTHTOKEN.
Visit the prerequisites page to generate them if you dont have it ready.
export NGROK_DOMAIN="diverse-namely-lab.ngrok-free.app"
export NGROK_AUTHTOKEN=************************************
export NGROK_API_KEY=***************************************
Deploy Ngrok Ingress Controller (Ngrok Operator)
To expose an applications using Ngrok, we need to deploy the Ngrok Ingress Controller. It is a specialized ingress controller implementation that leverages Ngrok's tunneling capabilities. (More details abouts its workflow is added in the next section)
We will use Helm to install the Ngrok ingress controller.
First, add the ngrok k8s ingress controller using the following commands.
$ helm repo add ngrok https://charts.ngrok.com

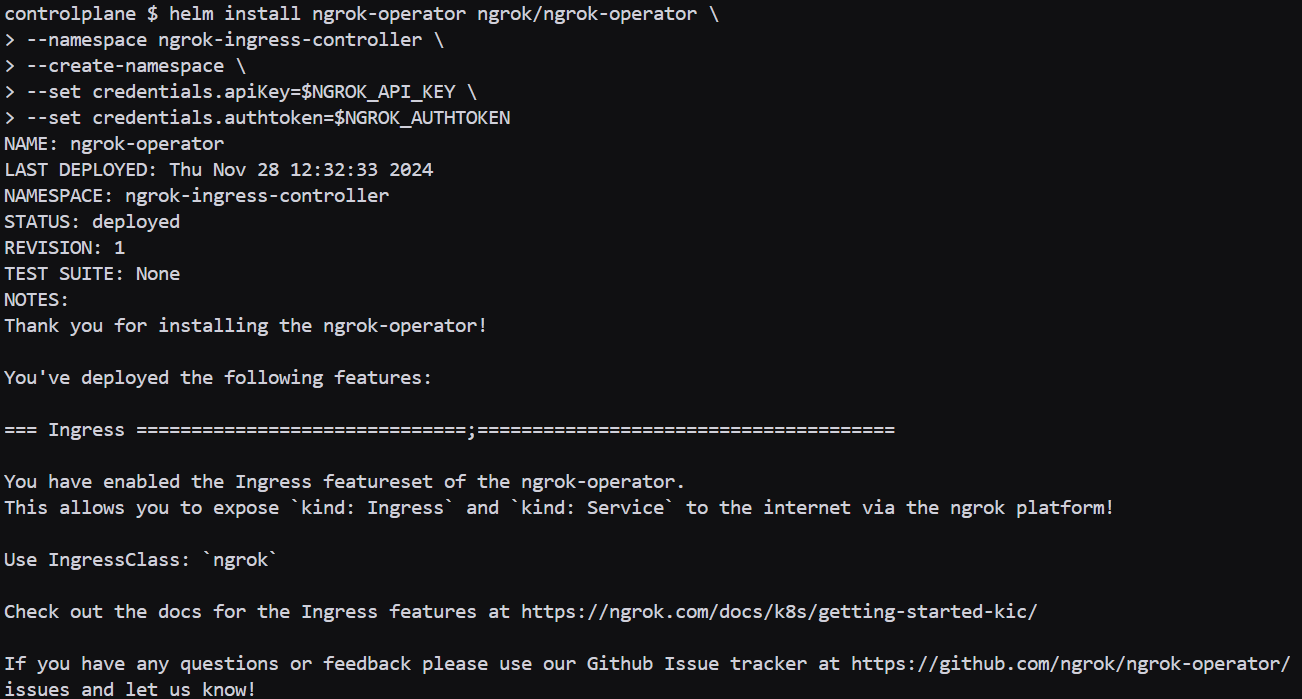
$ helm install ngrok-operator ngrok/ngrok-operator \
--namespace ngrok-ingress-controller \
--create-namespace \
--set credentials.apiKey=$NGROK_API_KEY \
--set credentials.authtoken=$NGROK_AUTHTOKEN
You would get an output as given below.

Deploy a Sample Application
Now that we have the Ingress Controller ready, we will deploy a sample NGINX application and expose it as an ingress using the Ngrok domain.
Deploy NGINX and expose it as a service using the following steps.
kubectl apply -f - <<EOF
apiVersion: apps/v1
kind: Deployment
metadata:
  name: nginx-deployment
spec:
  replicas: 1
  selector:
    matchLabels:
      app: nginx
  template:
    metadata:
      labels:
        app: nginx
    spec:
      containers:
        - name: nginx
          image: nginx:latest
          ports:
            - containerPort: 80
---
apiVersion: v1
kind: Service
metadata:
  name: nginx-service
spec:
  selector:
    app: nginx
  ports:
    - protocol: TCP
      port: 80
      targetPort: 80
  type: ClusterIP
EOF
Now create the following Ingress object. As you can see, we are using the $NGROK_DOMAIN variable to assign the host. We set up this variable earlier, so it will automatically be assigned to the Ingress object.
kubectl apply -f - <<EOF
apiVersion: networking.k8s.io/v1
kind: Ingress
metadata:
  name: nginx-ingress
spec:
  ingressClassName: ngrok
  rules:
    - host: $NGROK_DOMAIN
      http:
        paths:
          - path: /
            pathType: Prefix
            backend:
              service:
                name: nginx-service
                port:
                  number: 80
EOF
Sometimes, the Ingress object fails with the following error:
The Ingress "nginx-ingress" is invalid: spec.rules[0].host: Invalid value: "$NGROK_DOMAIN": a lowercase RFC 1123 subdomain must consist of lower case alphanumeric characters, '-' or '.', and must start and end with an alphanumeric character (e.g. 'example.com', regex used for validation is '[a-z0-9]([-a-z0-9]*[a-z0-9])?(\.[a-z0-9]([-a-z0-9]*[a-z0-9])?)*')As a resolution, we can replace the environment variable $NGROK_DOMAIN with the exact value.
Access the Application using Ngrok Domain
Now that the application is deployed, we can access the application using the Ngrok Public Domain.
Access your Ngrok domain in the browser. Initially, the site will display a default Ngrok landing page for every domain as shown below.

Once you click on Visit Site, your actual NGINX homepage will appear, as shown below. Your application can now be accessed publicly from any location using this DNS.

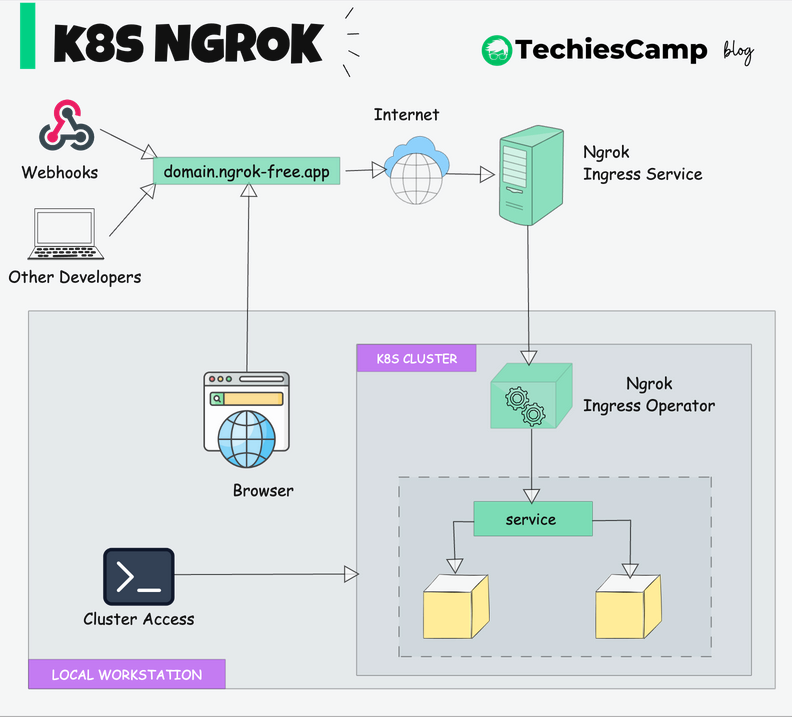
Ngrok Kubernetes Operator Workflow
Let’s break it down step by step.
When we expose a service through the Ngrok Ingress Controller, a common question might be:
"How does the public DNS connect to the local service we exposed?"
Here’s how it works:
When you install the Ngrok Ingress Controller in your Kubernetes cluster, its pods create persistent TLS connections to Ngrok’s global service. These connections act like secure tunnels between your cluster and the internet.
When you create an Ingress object in your Kubernetes cluster, the Ngrok Controller automatically sends the associated configuration (like the domain name, IP restrictions, and authentication rules) to Ngrok’s global service.

Ngrok’s global service consists of servers and endpoints spread across multiple locations worldwide. These servers act as Ngrok’s "points of presence" on the internet, receiving traffic on your behalf.
Based on the configuration you provided in the Ingress object, Ngrok’s service updates its global servers to recognize and handle incoming traffic for your domain. When someone accesses the public DNS (the Ngrok-provided domain), the traffic is routed to Ngrok’s infrastructure.
Instead of exposing your Kubernetes cluster directly to the internet, Ngrok acts as a secure intermediary. Traffic from the internet first hits Ngrok’s global servers. Then, it securely tunnels this traffic to your Kubernetes cluster, directly to the service you exposed.
In simple terms, Ngrok creates a bridge between the internet and your local Kubernetes cluster without requiring you to manually configure IPs, DNS, or TLS. Its global servers handle incoming traffic, ensure it meets your specified configurations, and securely pass it to your cluster.
Conclusion
In this hands-on guide, we demonstrated how to deploy and expose an NGINX application using Kubernetes and Ngrok. By leveraging Ngrok’s tunneling capabilities, we were able to make our locally hosted applications accessible over the internet with a secure and publicly available DNS.
This setup is particularly useful for testing, sharing, and debugging applications in a local development environment without needing to set up a cloud infrastructure. Whether you're testing webhooks or sharing your work with a team, this approach provides a seamless and efficient workflow.
We hope this guide has helped you understand the process and encouraged you to explore further possibilities with Kubernetes and Ngrok.
Happy coding! 🚀
Alex Philip, an island-born tech enthusiast, is deeply passionate about Linux, Kubernetes, DevOps, and cloud computing. A strong proponent of Free and Open Source Software (FOSS).
