Scheduler in Kubernetes: A Quick Guide
The kube-scheduler is responsible for scheduling Kubernetes pods on worker nodes.
When you deploy a pod, you specify the pod requirements such as CPU, memory, affinity, taints or tolerations, priority, persistent volumes (PV), etc.
The scheduler’s primary task is to identify the create request and choose the best node for a pod that satisfies the requirements.
Scheduling Workflow
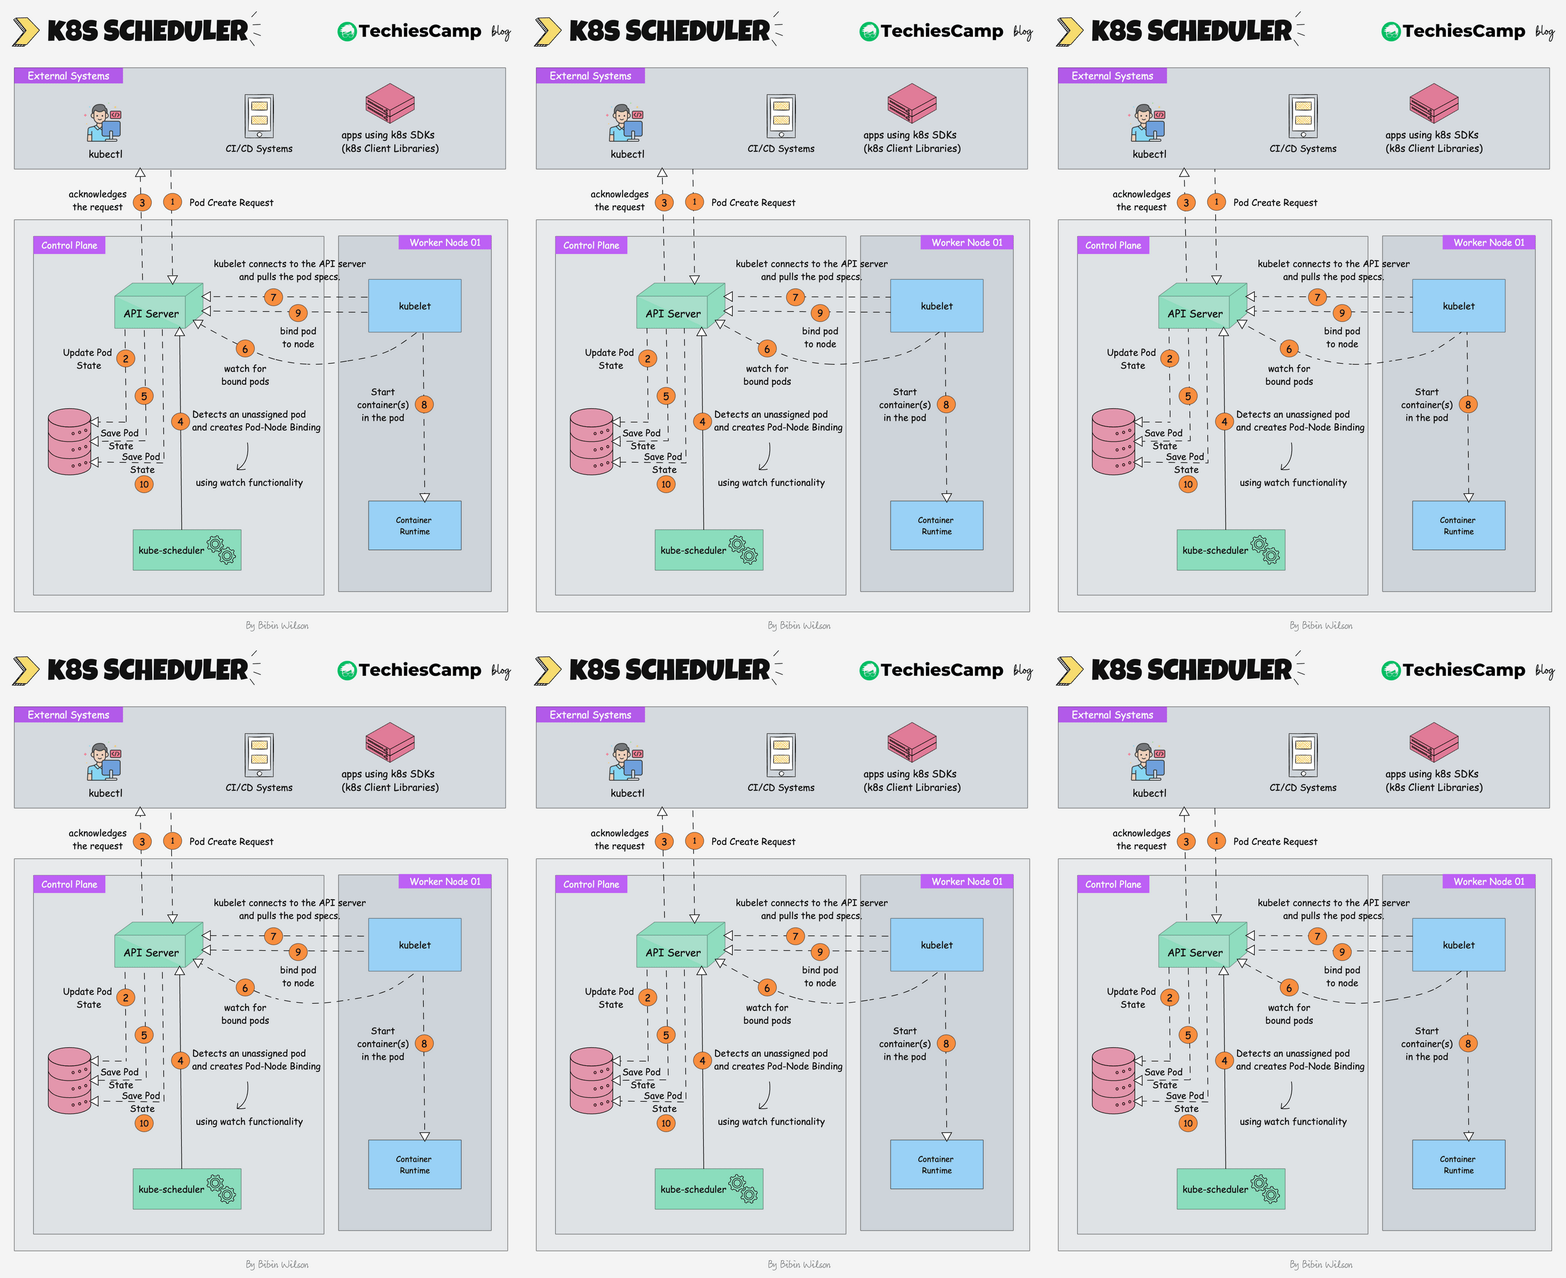
The following image shows a high-level overview of how the scheduling works.

Here is the step by step explanation.
- Pod Create Request: The process begins when an external system (like kubectl or a CI/CD system) sends a request to create a new pod.
- The kube-api server receives this request and saves the pod state to etcd, the cluster's distributed key-value store.
- The api server sends an acknowledgment back to the external system.
- The Kubernetes scheduler, which is constantly watching for unassigned pods (using watch functionality), notices the new pod.
- The scheduler decides which node the pod should run on based on the pod's requirements (e.g., CPU, memory, affinity/anti-affinity rules) and creates a pod-node binding. It informs the API server of this binding decision.
- The scheduler updates the pod’s state in etcd (via the API server), marking it as "scheduled" with the node it is assigned to.
- The kubelet on the selected worker node, which is constantly watching for new pod assignments (using watch functionality), detects the newly assigned pod.
- The kubelet pulls the pod data from the API server. This data includes details like the container images, volumes, and networking configuration that need to be set up.
- The kubelet instructs the container runtime (e.g., Docker, CRI-O) to start the container(s) for the pod.
- The kubelet informs the api server that the pod is now bound to the node.
- The api server updates the final pod state in etcd.The API server updates the final pod state in etcd, ensuring that the current state is accurately reflected in the cluster's database.